Fixed shower for vanlife?
The fixed shower is something we went back and forth on for a long time. Having lived in not one, but two vans for over 4 years now without a fixed shower, we really wanted to make sure we were making the right decision for us. That’s really the biggest point we want to make here: when you are building your own van, you should make decisions that make sense for you.
We try to stay very active while on the road, and while the pop-up or outdoor showers were great, there is nothing like the privacy and comfort of having your own space to shower and use the bathroom in your van. It is especially nice to have at the end of a long hike or run while we are out on the road.
Before we jump into the process of how we built this shower, it is worth mentioning that dedicating this much space to a shower that remains empty the majority of the time shouldn’t be taken lightly. After all, you are only working with about 40–70 square feet in a van. Our advice on the fixed shower: it's totally worth it for longer wheelbase, high-roof vehicles. Skip it or build a more compact option in a shorter wheelbase or low-roof vehicle.
Designing the shower space for our van.

We use the free version of Google Sketchup to design our builds. Download for free HERE
The design stage is always so rewarding and fun. If you haven’t already, we would highly recommend downloading Sketchup (or CAD if you're fancy like that) and playing around in the program before starting your build! While designing this shower, we had a few goals in mind.
We knew we wanted a closed-off cab for insulation and privacy (and let's be real, it looks better not to see the dash and seats in your house), but we still wanted access from the cab to the living area for safety and convenience.
We knew if we were dedicating this much space to a shower, we wanted it to be comfortable, not a little stall shower shoved into a corner of our home. We figured the minimum dimensions would be 26" x 40" to be comfortable for us.
As designers and tiny living enthusiasts, we wanted the shower to match the aesthetics of the rest of the build. This meant the same seamless finish as our walls and ceilings. We were going for a spa-like feel and are so thrilled with how it came out.
We wanted as light a finish as possible. Ceramic tile, LVT, and other finishes can end up being extremely heavy, and we always aim to keep the weight as low to the floor as possible, so this was a must! All weight that gets added during a build factors into gas mileage and vehicle wear and must fit within the total weight capacity of the vehicle as well. So lighter is always better.

Originally, we planned to use 8020 aluminum extrude to frame out this build, but after calculating the costs, it would have come out to about $35K USD just to frame out the whole van in 15-series 8020! We opted to use treated pine 1x2’s to frame the shower instead, which were actually about 1.2 lbs lighter than the 8020 by length. The downsides of wood over aluminum extrude are that it is more prone to warping, and you deal with more inconsistencies while building since nothing is exactly square or precise. Another option that is great for framing showers is galvanized steel, but we felt that this was too bulky since we wanted to minimize the negative space taken up by the framing.
Shower placement & orientation


By placing the shower parallel to the wall that we planned to build to divide the cabin and living space, we gained valuable space behind it for the rest of the build. Since we wanted the side door to be open and clear for easy access for us and the cats, it felt like placing a large shower directly across from it would cut down on kitchen and living space while leaving a large, unusable space between the shower and sliding door. With the cab divider and comically high position of the Ram Promaster seats, we didn’t plan to install swivel seats either, so we also wouldn’t have made use of the open space behind the passenger seat. Since we also planned to use a Nautilus shower door (which is basically just an opaque sheet), we wanted as much privacy as possible while using the bathroom. We decided that a smaller opening on the side with no view through the opaque door from the main space or kitchen was the way to go! This is not a typical orientation and ended up causing a lot of complications in the build that a more typical shower orientation would have helped us avoid. For us, this was well worth it for the finished result. And to be honest, you can’t beat the view from the toilet if you are in a more remote camping spot!
Beginning the build.
Now that the fun part of scrolling around on our computer designing the shower of our dreams was over, it was time to actually build it. And what a build it was. We began by building the wall with the pocket door. Since that isn’t specific to a shower build, we will make a separate post about pocked doors and cab divisions. We also made a Patreon video about the process of building this cab division HERE.


After building the pocket door and cab divider wall, it was time to begin framing out the shower space. We did this by cutting down pine 1x2’s, building a frame in place, removing and assembling it, and then securing it with adhesive and screws to the subfloor as well as the strapping on the roof. It’s important to note that we specifically designed this wall framing to align with our strapping that was bolted into our frontmost roof rib for extra security.
Note: An adhesive like Sikaflex 221 will help prevent wood from squeaking as you drive. We use this technique of gluing and screwing any time we are adhering something for the final time in a van to avoid creaking.


Now that we had an idea of exactly where everything would land, we installed a moisture barrier by using LOW-E, wired our lights and touch dimmable switches, and installed our hot and cold mixer (yes this is a bidet mixer but is incredibly low profile and we love it) and hot and cold PEX water lines. We decided to install a boat hatch above our bathroom for more natural light and airflow, which was actually done earlier in the build. It was difficult without the placement of the framing to get it installed in exactly the right spot, so this could be done at this stage as well (just make sure to clean up all the metal shavings and seal the metal edge!). We would also recommend installing a fan like THIS ONE on the roof if you wanted a little more ventilation in your bathroom as well.


Waterproofing with the Schluter system.
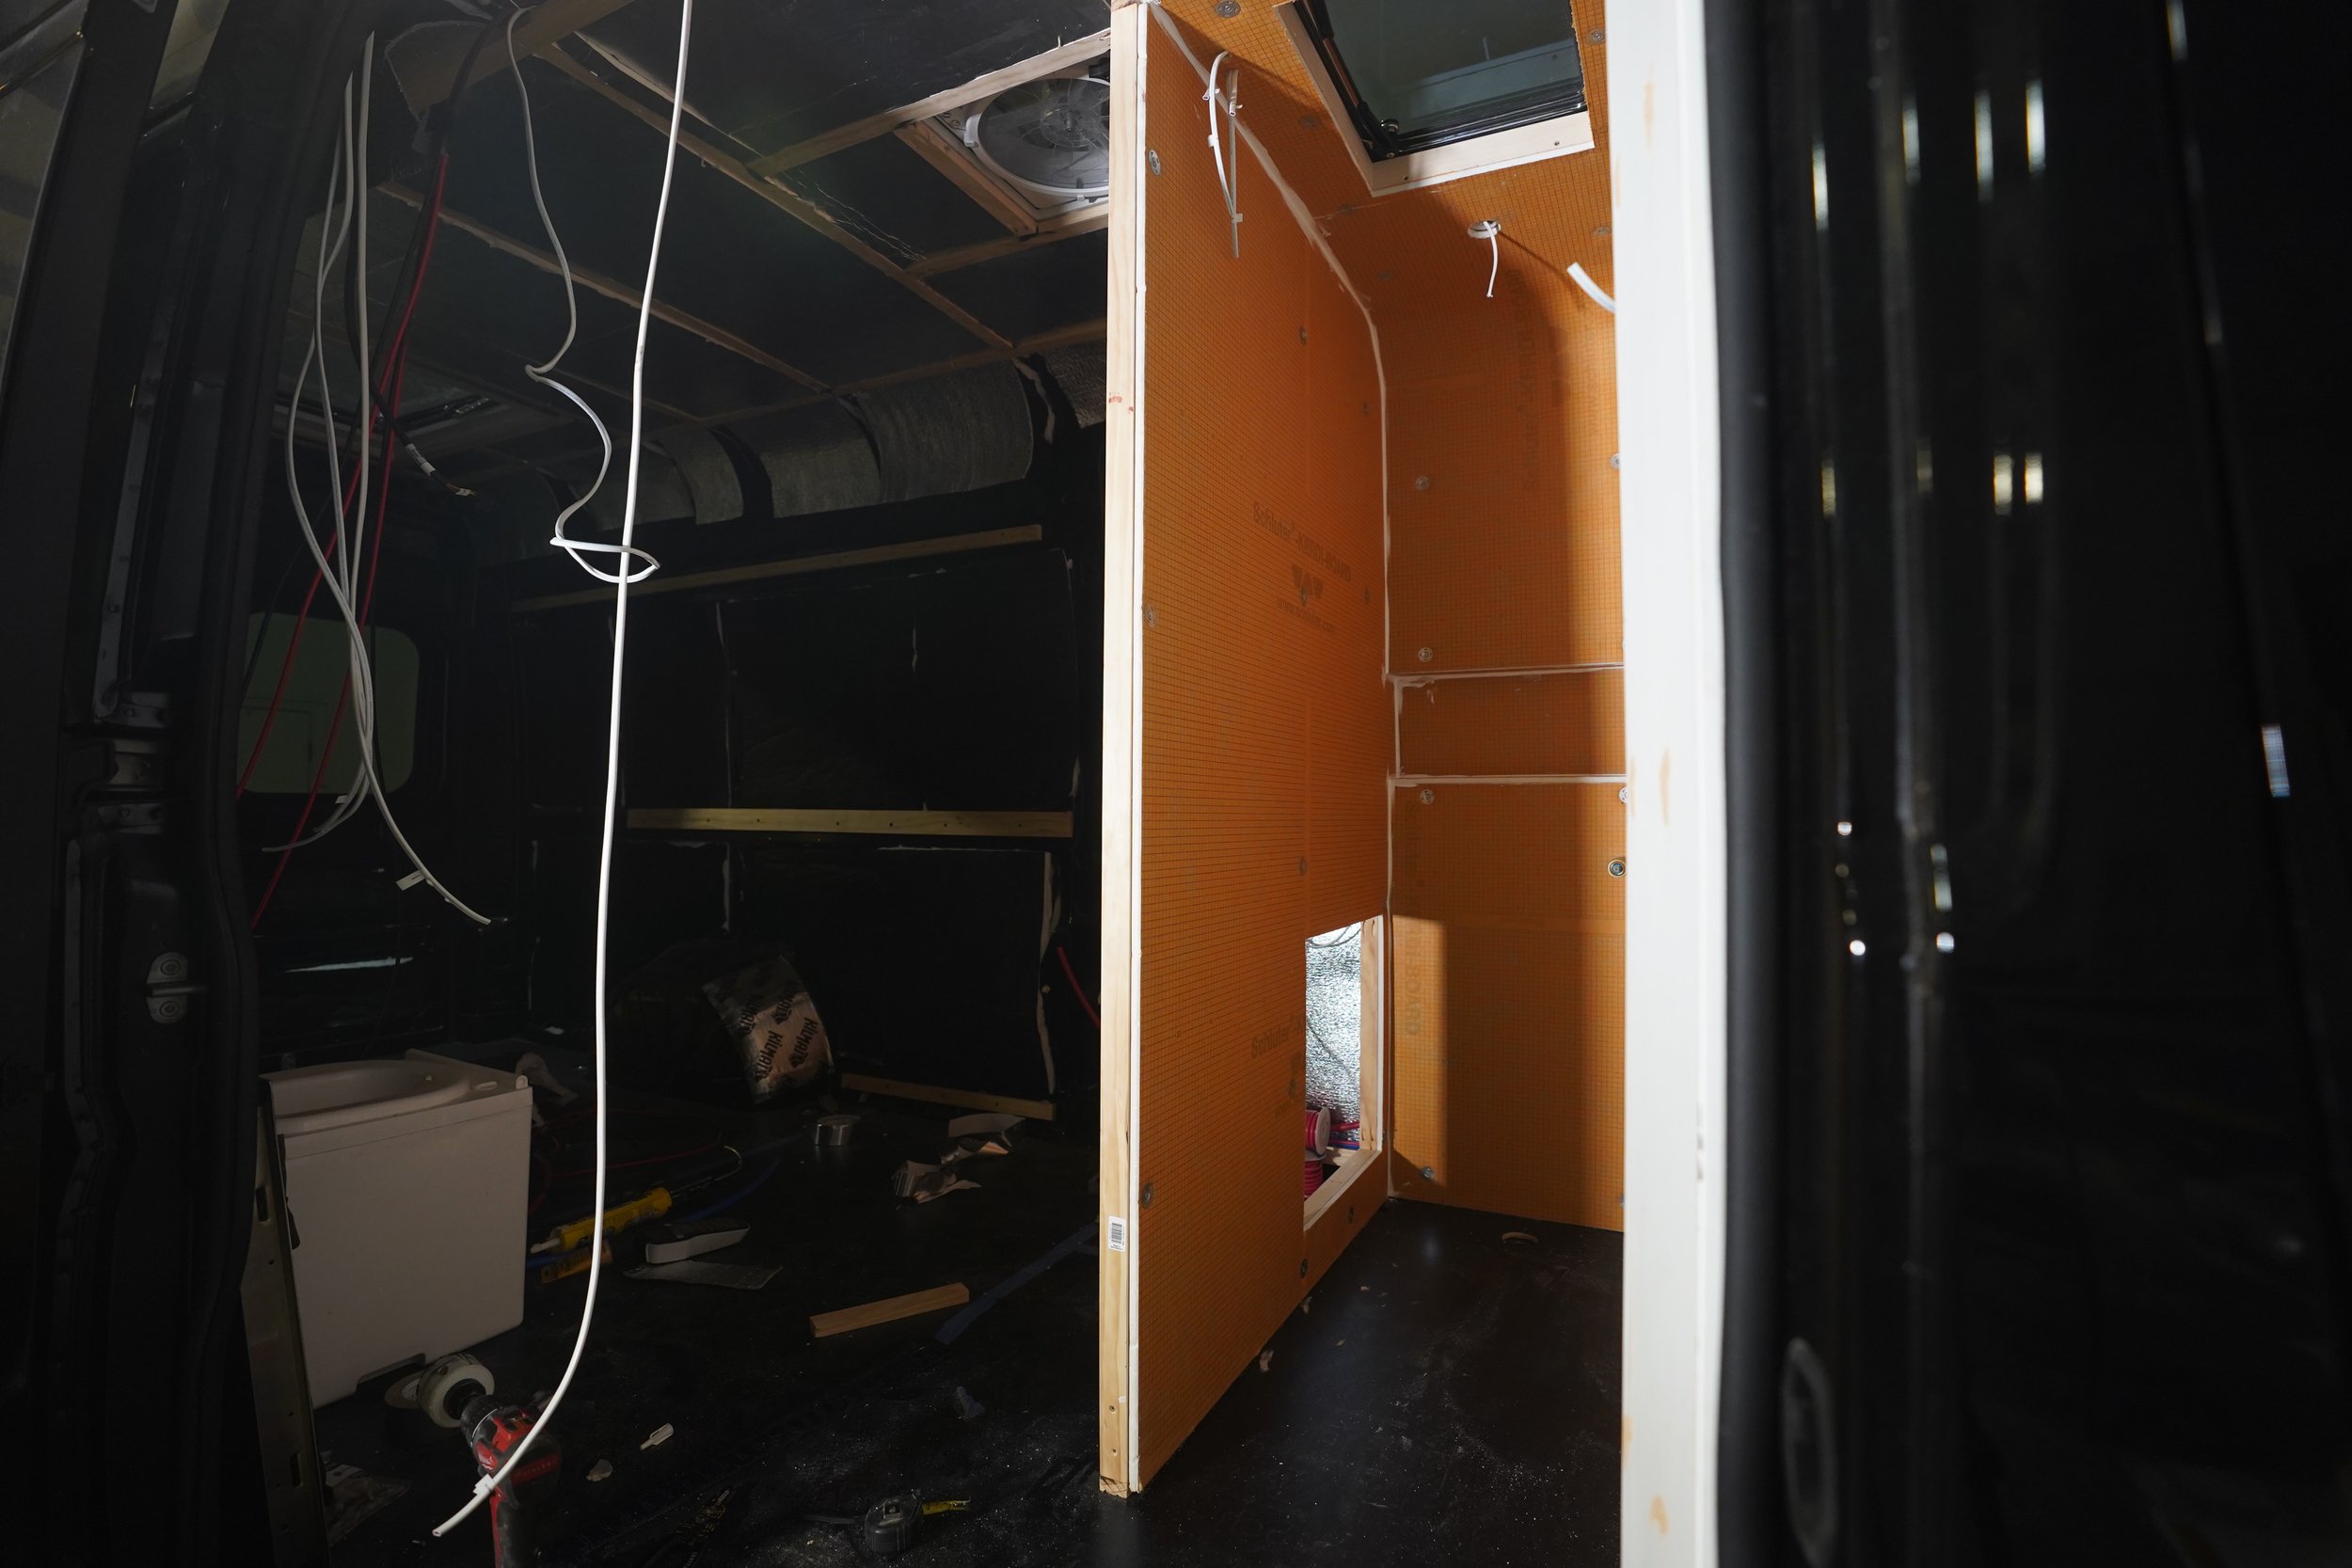
After completing the wiring and installing the mixer, it was time for the waterproofing stage of the shower build. We used Kerdi board from Schluter for an ultra-lightweight and completely waterproof base layer and a Kerdi shower pan with a seamless drain. We love this system and have used it multiple times now, with the only downsides being that it is expensive and the color can be difficult to cover since it is a bright orange! The first step was to template out everything for a dry fit.

The rounded top corner was achieved by using a method called kerf bending, where we cut small grooves about 3/8 inches apart that only went about half way through the Kerdi board and did not impact the waterproof membrane on the front side. This allowed a predetermined section of the wall to be flexible while the back wall and ceiling remained rigid.

This process took a very long time since the dry-fit cuts all had to be exact. Luckily, Kerdi board has a grid pattern on it that makes it easier to measure out for complex cuts like this. A tip is to use paper or light-weight cardboard to template smaller, more complicated sections and trace out a corner or flat edge to align with the Kerdi grid before cutting the Kerdi board itself. At $115 USD a sheet, this stuff is expensive, so we took our time to avoid as many mistakes as possible on this part of the build. Featured is our Cuddy composting toilet, which we later built a drawer system for in the shower.

We used a small router and flush trim bit to get an exact cut around the skylight and toilet drawer opening for our waterproof access door.
Once the panels were 100% dry-fitted and we were happy with everything (yes, we botched one cut and had to replace the panel), we moved on to permanently adhering and fastening them to the framing of the shower. We did this using a product called Kerdi Fix and the Kerdi system fasteners for a permanent bond to the strapping. We made sure to clearly mark our strapping layout on the grid system on the front of the Kerdi board so we knew where to put the fasteners once the panels were glued up.


After the final install, we ran a bead of Kerdi Fix around all of the seams just for peace of mind before covering them with Kerdi Tape to fully waterproof them.
Next, we began the dreaded process of waterproofing all the seams, fasteners, and corners with Kerdi tape and Schluter's unmodified thin set. This process just plain stinks and is often overlooked in camper van buildouts with this or similar waterproofing systems. Since we are trying to follow the installation instructions as closely as possible, we do feel that it is a necessary step in the waterproofing process for this shower system, even though it is difficult and time-consuming. We chose to do this step before installing the shower pan and instead put down a sheet of cardboard since lots of thin set ends up on the ground. The thin set goes down extremely thin with the tape, so not much weight is added during this stage. This process was repeated to fully waterproof the shower pan and drain after it was installed.


This is the finished result after the thin set had dried overnight. You can see we also measured and cut the hole for our shower drain during the drying process. This can be fairly complicated since you have to be sure that the underside of the van is clear of obstructions. We actually rerouted the exhaust on our Ram Promaster for this drain placement, as well as the 76-gallon underslung water system we installed later in the build.


Hidden toilet drawer.
At this stage, we let all of the thin set dry while we began building the slide-out toilet. This basically consists of a storage box built to the dimensions of our toilet of choice, the Cuddy, and a tray that the Cuddy can be placed in. Both of these were built with baltic birch 1/2-inch plywood and treated with 3 coats of wipe-on polyurethane.
We attached the tray to the box with these 250-pound locking drawer slides and purchased this stainless steel access door, which we waterproofed with 1/8-inch foam tape around the inside of the lid where it connected to the flange.
Then we installed it next to the shower, mounting it to the subfloor and back wall strapping as well as the kitchen cabinets after they were installed. We left about 2.5 inches between the bottom of the access door and the shower pan for optimal water proofing and so that there was no interference with the sloped shower pan.


We wanted the toilet to be able to slide in and out for easy access, rather than moving it out every time we wanted to shower. This is a little extra, though, and the easiest solution would be to just let the toilet rest in the shower and remove it when you want to take a shower.
Finishing the shower with roman clay?
The finish we chose for the shower is theoretical at best but has been highly requested, so here it goes! We used piano room roman clay from Portola Paints.
DISCLAIMER: This is a highly difficult, 14-stage finish, and we really have no idea how well it will hold up with years of use. So far, we have driven about 5K miles and showered over 100 times with no issues or signs of cracking or peeling of any kind. One of the most common questions we have been asked about this finish is how heavy it is. It seems the term "clay" is typically associated with weight. We estimate the total weight of the roman clay used to finish the shower was about 5-7 lbs. since it goes on so thinly. Think more of a paint you apply with a sparkle knife than clay. This turned out to be much lighter than tile or LVT as a finishing option.
We also don’t have a shower that constantly runs. Instead, we chose to really minimize our water usage to less than 1 gallon of water per shower. This helps with less wear on the finish since there aren’t 20 minutes of constant water exposure at a time every time we shower.


The first stage was to apply two coats of Roman clay primer from Portola Paints. This helped to cover the orange color of the Kerdi board and provided a good base for the Roman clay application. Working in such a cramped space was difficult and time-consuming, and it ended up feeling like an endless process over the course of the 3 weeks it took to complete the entire shower build. We used a portable heater to warm up the space and dry each coat before beginning the next application.

Obviously, the inspector had to sign off on each stage of the build.
From there, we began the process of coating the shower with Roman clay. We quickly realized the 2 coats we had anticipated would not be nearly enough to cover the slight ridges created by the Kerdi tape and ended up doing 6 coats of Roman clay for optimal coverage. We used a spackle knife set to apply the clay with this technique from Portola. Each coat took about 3 hours to apply and then needed to be sanded lightly by hand, which took another hour and a half. At this stage, we were really questioning whether or not this finish would be worth the effort.


The final sanding stage after the 6th coat of Roman clay.
The next 3 coats of the finish were done with Roman clay sealer, and this is where more of the texture showed up. This sealer provides extra protection for the clay. It goes on very thin, and we decided to do an extra coat (recommendation 2) for optimal coverage and protection of the clay.
The application process is very similar to the Roman clay, and the sealer goes on white and dries clear. At this stage, we started to see more of what the finished product was going to look like and got very excited for the finished shower. Note: You can use a plastic spackle knife to avoid leaving metal marks in the clear sealer. We actually liked the more textured look of the metal knife, so that’s what we used.


The final 3 coats were an acrylic clear coat that we spayed on using this sprayer system. We really wanted to ensure that the shower was 100% sealed, and since the sealer and roman clay are technically not rated for water proofing, we decided on a clear acrylic coat. We did multiple tests to ensure that it wouldn't negatively interact with the Roman clay sealer and sprayed it in after taping and bagging off everything we didn’t want to get sprayed. An alternative method would be to use a rattle can of clear acrylic for these three coats, although the finish may come out a bit rougher.
Finishing out the shower.
To finish the shower, we needed to install the shower front face and Nautilus waterproof shower door.
We chose to do a curved top on our shower door, which definitely falls more into the form over function category. However, we really love the way the space flows with this choice and don’t regret it at all.


For the front door, we traced a bunch of lines based on the Nautilus measurements since we wanted to completely hide the door behind the left side of the face piece. We cut this out using a track saw and jig saw, which are two very versatile tools we’d recommend for any building project! We finished this piece out with 2 coats of primer, 2 coats of Roman clay, and 2 coats of sealer. We also sprayed the inside with clear acrylic, but since this is behind the nautilus door, it doesn’t need to be as specifically waterproofed as the other portion of the shower. This was glued on using Sikaflex 221 and screwed to the framing and the partition wall with pocket hole screws.
The Nautilus waterproof shower door took several weeks to ship, so we didn’t end up getting any photos of that installation process, but it is pretty straightforward with the installation instructions from Stoett.
Overall, we are quite happy with the results from this shower, but they certainly didn’t come without a lot of hard work. What do you think? Did it pay off? Let us know, and thanks for checking out this blog post!